Now that we've taken a
first look at the GUI Editor's interface, let's take a moment to learn more
about placing, moving, and editing the properties of a GUI control.
The following guide will take
you through the process of creating a new command button, step-by-step.
1. Create a new Button control by clicking the "New Control" drop down menu on the left, as shown in Figure 14. Standard Buttons use a single color as their background, can display text, and be clicked on. There are flashier button controls, but those are addressed in other tutorials found on the Main Doc Page and TDN.
Once you've clicked the GuiButtonCtrl, you'll notice a plain box will appear on your screen (Figure 15).
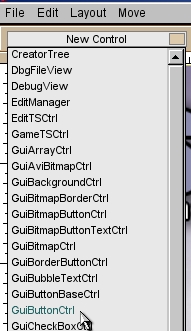
Figure 14
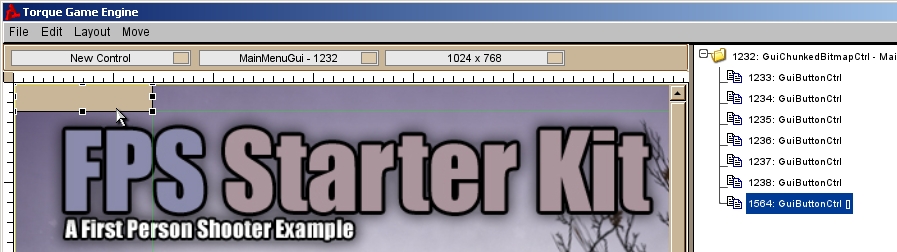
Figure 15
Once
placed, the component will automatically be selected for you. Also, the control will be listed in the Inspector Dialog tree, under MainMenuGui as shown in Figure 16.
This is because you created the control inside the 'window' that defines the
Main Menu. As such, the MainMenuGui is the parent, or container object,
of GuiButtonCtrl. The properties of Parent controls can also affect the
properties of controls that are contained within them. For example, if the
MainMenuGui’s visibility is set to false, all of its children will
be invisible as well.
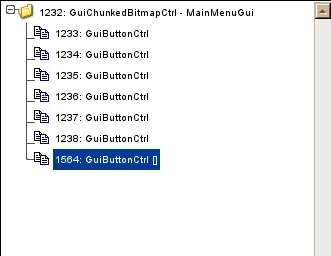
Figure 16
If your new control is placed in an inconvenient location, you can move it by clicking and holding down the left mouse button. As you click, the icon will change from a pointer to an arrow "cross". See Figure 17 for an example. While holding down the mouse button, drag your component to a more suitable editing area.
You should also notice that when your GuiButtonCtrl is selected, as shown on Inspector Dialog in Figure 18, it has its own properties unique to the component type. The Profile field
is currently set as GuiButtonProfile. Profiles are used to determine the appearance of a GUI component: color scheme, bitmap array, font size and type, etc.
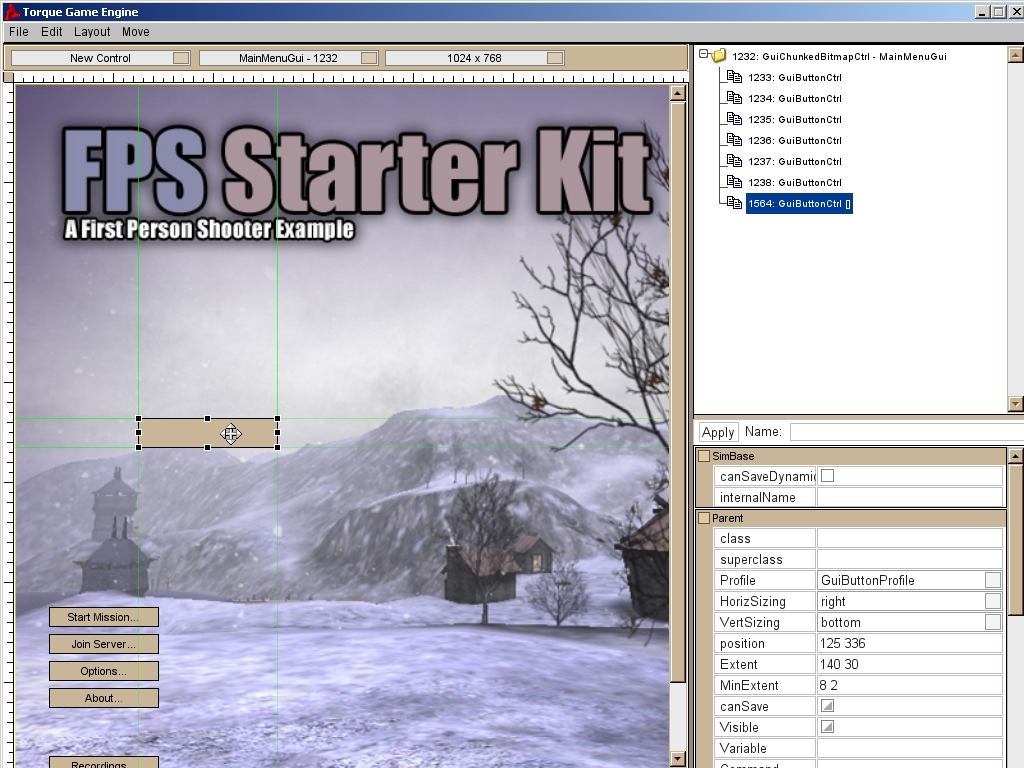
Figure 17
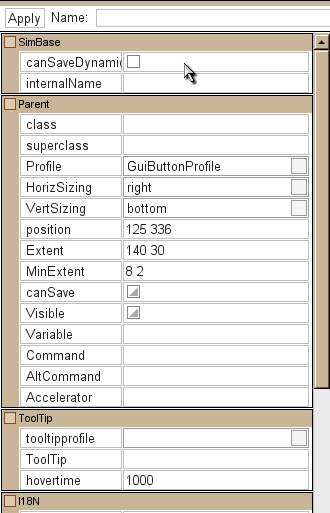
Figure 18
2.
While
we are looking at the Properties window, let’s go ahead and change some
fields. At the very top of the
properties is the Name field. This will set the actual name of the
GUI. Currently, the name is blank,
which means we only see the component type (GuiButtonCtrl) and ID, in the Gui
Tree View. Fill in the blank space
with myButton, then click the Apply button in the top right.
Scroll
down through the properties until you come to the text field under GuiButtonBaseCtrl. Change this field to “Show Hello World” (*without the
quotes*). Again, click the Apply button in the top right to save
the changes. See Figure 19 to
view the changes made to Name and Text.
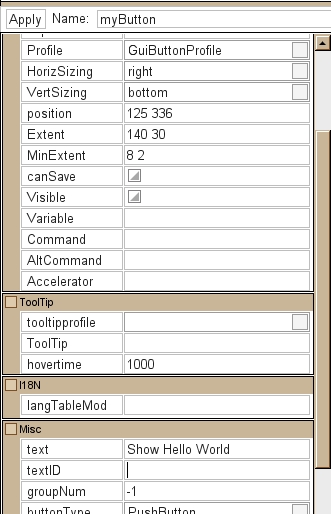
Figure 19
Your
text will now display on the button, as shown in Figure 20. Also, if you look at the GUI Tree View,
your button will now have a name.
This helps with organization and finding your controls easily. Look at Figure 21 to see an example of
how myButton looks in the GUI Tree
View.
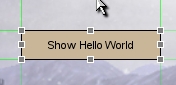
Figure 20
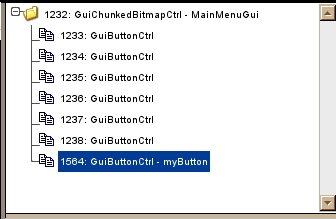
Figure 21
3.
Before
we move on to cosmetic changes, we should give the button some
functionality. With the control
still selected, look for the 'command'
field in the Inspector Dialog. Whenever a button is clicked, whatever script
command is placed in this field will be executed. Using real data and syntax is
important. Enter the following command:
Canvas.pushDialog(HelloWorld);
See Figure 22 if you need a visual reference on what to type and where. Everything you see on screen is layered on a main Canvas. The command we added tells the main Canvas to push a separate dialog (which we will create later) on to the screen. Detailed information on Torque Script will be covered in a separate section. For now, that simple explanation will do.
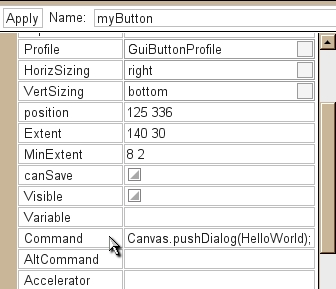
Figure 22
4.
Let’s
make a few cosmetic changes to the myButton. Because user interfaces are very
important to keep your audience interested, you need to have precise control
over the placement of all your GUI controls. We can do this in Torque's GUI
Editor by changing the ‘position’
and ‘Extent’ fields in
the Inspector Dialog.
Alternatively, if you click and drag one of the black boxes at the
corners and sides of the button, the corresponding fields in the Inspector
Dialog will change.
When
moving the entire component around, the ‘position’ field will change. If you resize the button, the ‘extent’ field will adjust
accordingly. If you type your
values into the proper fields, the button will change automatically to fit the
proper data. See Figure 23 for a
visual reference as to what you should click, and where you should look in the
Inspector Dialog.
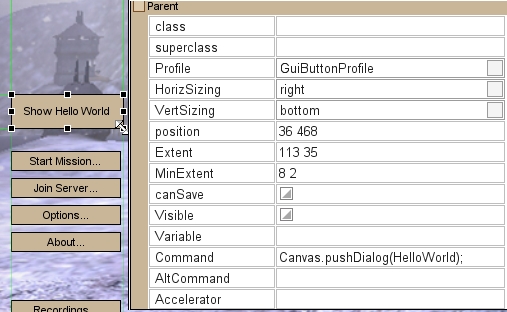
Figure 23
5.
Whenever
you are doing any kind of editing on a computer, whether it is documentation or
game development, you should always remember the classic mantra: “Save, and save often. Then save some more.” Torque’s GUI Editor does not have
an auto-save feature. If your
computer crashes after you have spent hours creating a GUI, you will not be a
happy developer. Now would be a
great time to save the work you’ve put into creating this button.
As
shown in Figure 24, go the top left corner of the GUI editor and click on File->Save to Files… Ctrl s. When the “Save File” file
dialog appears, there is a chance you will be browsing your root directory (Figure 25).
Navigate to the folder which contains the GUI you are editing (starter.fps/client/ui in this case). on the mainMenuGui.gui
file and click Save to overwrite the
old Main Menu GUI with the new button addition. Match your save dialog with the one
shown in Figure 26.
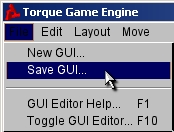
Figure 24

Figure 25
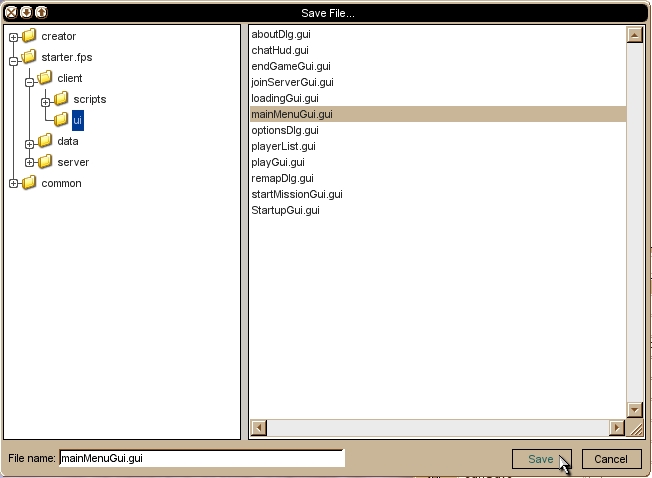
Figure 26
6. With your changes saved, press F10 to close the GUI Editor and see how your new button looks on the Main Menu. If your button has unexpectedly moved or resized, as shown in Figure 27, we need to change a few fields.
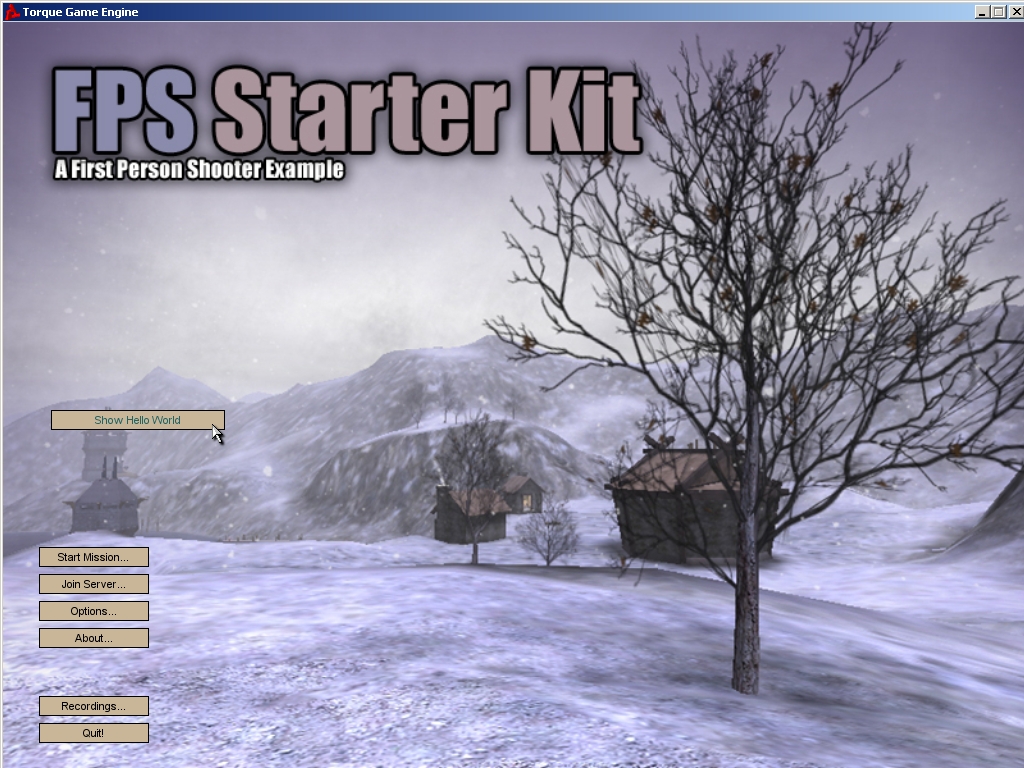
Figure 27
This happens because the control does not have a
proper alignment. To fix this, go back into the GUI Editor, select the button
you created, and change the vertSizing
to "Top",
as in Figure 28. Now, click Apply. By changing the vertSizing or horizSizing
options you're telling the GUI control to align the control in a particular
way.
You can experiment with the different alignment
options to see the effects they have on controls. The main point to remember
though is that if your controls don't render in the proper place when the GUI
Editor closes, you need to change the vertSizing
and/or horizSizing options, so that
the controls are properly aligned to a border. Once you are done setting the
alignment, save the edited GUI again to finalize your work.
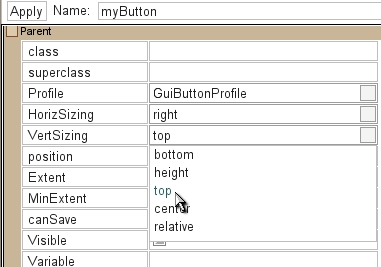
Figure 28
Close
the GUI Editor (F10) again, and take
time to appreciate your work.
Depending on any cosmetic adjustments you made, your final button
won’t look quite the same as what is shown in Figure 29, but you should
have something similar. Try
clicking on the button. Nothing
happens, right? We’ve added a
command, but if something has gone wrong we should always check the Console first. Press the ~ key to open the
Console. You should have an error
in the Console, as shown in Figure 30.
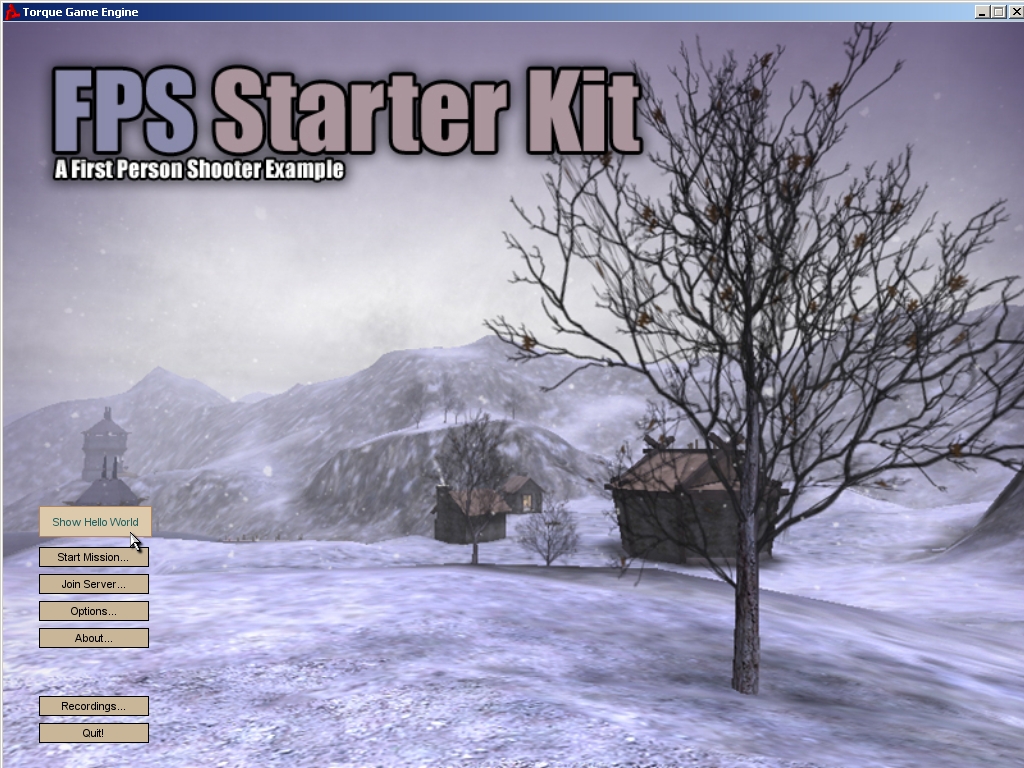
Figure 29
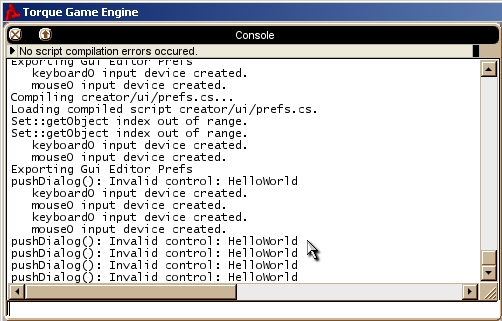
Figure 30
The
command works, but there is no HelloWorld
dialog. We have given the button a
script command to execute when it is clicked, but the command we entered won't
make any sense to Torque until we follow the steps in the next section, Creating A Dialog. Our script command told Torque to open a
new dialog control called "HelloWorld", but we have not yet created
that dialog. Once we do so, everything will work as planned!